Showing posts with label Review. Show all posts

Friday, April 14, 2017

Delving into the Tomb of Horrors: Crypt of Acererak the Eternal

Hey there, neighbor
Welcome to the final installment of Delving into the Tomb of Horrors! Today I'll be analyzing chapter 6, "Tomb of Acererak Level", area 33, and giving some final thoughts on the module as well as some related materials associated with the Tomb of Horrors.

Tomb of Horrors: Tomb of Acererak Level


33. Crypt of Acererak the Eternal

We're finally in the Tomb itself, the last area, the big one.
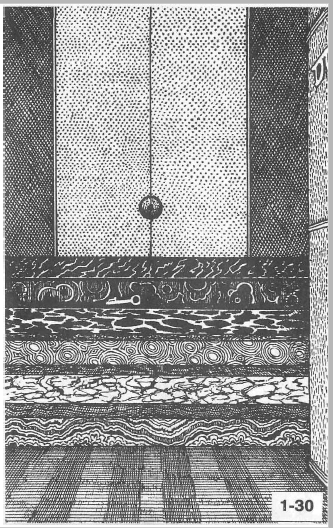
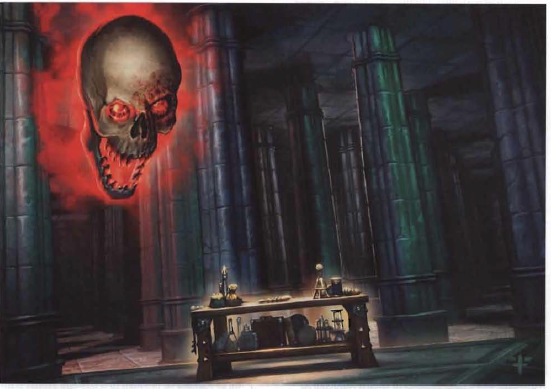
Pictured: your prize. Happy now?
The opening of the vault is a matter of trial-and-error that doesn't really merit too much discussion. Honestly, I think this mechanism was placed here to make certain parties think this area is a dead-end. Kind of one final test of "inspect everything." The real giveaway here is that the raising of the vault is slow enough to be nonlethal. This isn't a trap, it's a test.

That theme continues through the area. This is Gary's final test of the skills learned throughout the dungeon. Before we go into the details of this area, let's review the lessons learned in the Tomb of Horrors.
  1. Inspect Everything (using detect evil and detect magic, as much as possible)
  2. The Tomb is deadly but fair
  3. Brute force doesn't solve problems
  4. NPCs are usually friendly
The players could walk in and out of this tomb without a single issue if they have learned these lessons. Let's go through the area and see how each lesson is tested.

Inspect Everything

Things to inspect, especially with detect magic, identify, or detect evil:
  • Cursed Swords and Spears
  • The dust of the demilich
  • The skull of the demilich
Careful inspection of these items can completely negate any danger in this room. The ghost only forms, attacks, and uses its magic jar effect if it is attacked. The skull of Acererak only attacks if touched or attacked.

The Tomb is Deadly but Fair
Insane, but logically so
The sword that can destroy the demilich is right there in the treasure pile. The skull takes four rounds to consume a single soul. The ghost is harmless until attacked. Even the souls of the party can be recovered if a suitable host body is prepared, and the party can easily take the gems out of the dungeon to do so.

Brute Force doesn't Solve Problems

This could be the subtitle to this area. Both the ghost and the skull are only activated by tampering with them. There are three cursed weapons, and one is specifically a Spear of Backbiting, which hurts the wielder when they roll a natural 1.

Gary is really trying to clue the players in: Don't Fight!

NPCs are Usually Friendly

This is a tricky one, but the dust does form a man-like shape. This could lead to some parties questioning it rather than attacking.

It also leads to a novel solution to the skull problem: if the players befriended the siren, she can use her touch to cause the idiocy of the area she was found in. This effect lasts for 5d4 turns, but that would be long enough for Acererak to float back down without stealing a soul.

So what are we to take away from this area? If anything its that the final area of a dungeon should have the theming of the dungeon, but it should also culminate the various lessons taught throughout the campaign.

Tomb of Horrors: Final Thoughts

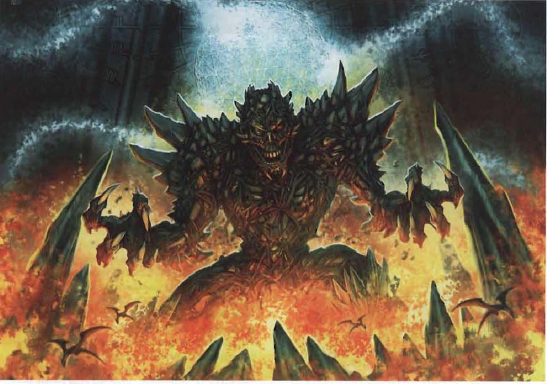
Sometimes that lesson is: devour the souls of mortals
I believe that D&D teaches cooperation, problem-solving, and in some cases it can teach morality. In fact, I would go so far as to say that an adventure, campaign, dungeon, or story has real value, which is determined by what lessons it can teach the audience.

So, we've laid out the lessons of the Tomb of Horrors, tested them thoroughly in the final areas, and seen a breakdown of the entire dungeon. The question then becomes: were the lessons valuable?

Let's break it down on three different levels.

To a modern RPG player, I would say that they are not that helpful. Inspecting everything in a story-driven game bogs down play and creates a sense of distrust between player and DM. Making a game deadly means that the characters in the story might not make it through the story. Although you could argue that not using brute force and trusting NPCs are good lessons, there are better ways to teach them. Additionally, story-driven games sometimes result in unavoidable violence, and sometimes NPCs are to be inspected, instead of trusted.

To a Dungeon Master, I believe the lessons taught by Tomb of Horrors are extremely valuable. They aren't the same lessons a player would learn, but a DM can learn theming, encounter and trap building, different ways to challenge players, and how to foreshadow traps and plot from this module. In this regard, I think Dungeon Masters should read and understand the Tomb of Horrors, even if they also acknowledge that their players would probably not benefit from being put through its rigours.
Lesson: was anybody really scared of the gargoyles? Did we need them everywhere?
Of course, the final level is simply on the level of human experience. It's hard to determine the value of these lessons without going into spirituality, value priorities, and politics. But personally, I think:
  • Inspect everything is a good lesson. Knowing more about the world around you is a good skill and preferable to ignorance.
  • Life can be brutal, but there is a logical consistency to it, much like the Tomb. Learning the principles by which life operates can lead to a better understanding and a more powerful experience.
  • Violence is never the answer, even in the face of other people being violent.
  • People can be spoken to and reasoned with, empathized with and loved, no matter who they are or appear to be.
Your values may differ than mine. That is okay. But I think any adventure reflects the world it was created in, and the Tomb of Horrors, like any good story, tells us things we already know about the world, just in a new way.

Tomb of Horrors: Related Products


I did want to address some products related to the Tomb of Horrors and how they fit with the module. I'll give a brief synopsis, then my opinion on their level of quality.

Return to the Tomb of Horrors
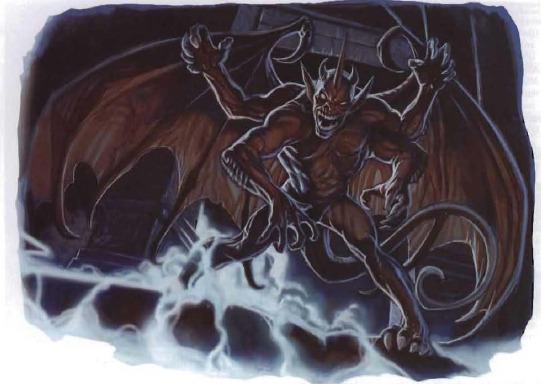
Come, sit in my lap, tell me what your heart desires...
This adventure provides a short set-up adventure that leads into the original Tomb of Horrors, then continues the story forward to its conclusion by explaining what Acererak has been doing, wandering the planes all these millennia. Essentially, the Tomb itself is designed to fill a phylactery large enough that he can merge himself with the entire Negative Energy Plane. The scope and deadliness of the adventure is truly epic.

I enjoyed the story leading up to the Tomb, but the latter half left a bad taste in my mouth. It was obviously designed to be deadlier than the tomb itself and left me wondering how any party could wend their way through the instant-death effects of The City that Waits and Acererak's Fortress of Conclusion. The module doesn't uphold the lessons or tone of the original dungeon, needing the player's knowledge of the original Tomb to hold their interest.

Again, I would look into the first part of this adventure. Skull City is a cool concept, and leading the players up to the Tomb is a good way to build up the campaign. But don't expect your players to make it to the end, or like the adventure afterwards.

Tomb of Horrors (4e)
Sometimes you just need a few days of alone time...
This adventure builds upon Return to the Tomb of Horrors, explaining how Acererak survived the previous events as a vestige. This adventure is broken into four parts, for characters level 10, 14, 17, and 22. The original Tomb is at level 17, but it's now a ruin with much less of the original deadliness. The players also travel to the Feywild, the City that Waits, Skull City, and for the big finale they must fight through a Tomb in Pluton, the now-desolate realm of the former God Nerull.

Of the non-direct-conversion adventures, I highly prefer this one. It does absolutely require the players to be aware of the Tomb of Horrors, and it's helpful if at they have a little knowledge of Return as well. However, the adventure seeks not to recreate the deadliness of the original module, but instead make the tone of fighting a powerful lich with epic ambitions apparent, while adapting the modules to a modern gamer's level.

I don't think this module preserves the lessons of the Tomb of Horrors, but instead revises them into a more story-focused adventure suitable for modern players. They don't try to make another death-trap, they try to convey the story of the Tomb of Horrors and how it got to where it was. They even include clue poems! My heart!

There are a lot of good ideas to pull from this adventure, but I can't say it could be ran as a standalone module. There's simply too many nods and hints towards the previous adventures.

Tales from the Yawning Portal

This collection of adventures includes a 5th-edition conversion of the original Tomb of Horrors. I've left the conversions off of this list up until now, but since this one was just released, I wanted to address it.

Look at me! I'm popular!
Now, I'm sure there will be a lot of varying opinions on this updated version of the module. I can already hear the the Internet getting their jimmies rustled. However, I think that Tales From the Yawning Portal puts together a solid 5e conversion for Tomb of Horrors.

This is a near letter-perfect reproduction of the Tomb, even including some of Gary's original wording in the room descriptions. The puzzles and riddles are preserved exactly, and all of the instant death traps are still just as deadly.

However, the thing that I'm most impressed with is that they preserved the slow learning process of the Tomb. With Tomb of Horrors, it's easy to make everything horrible and deadly, but the early traps in this version are mid-range damage, meaning a party may well make it into the deeper parts of the Tomb. As I've mentioned in previous articles, this dungeon is about teaching and experimenting, and they try to preserve that.

I'm also very happy with how Gary's "Count down from 10" instructions were updated for the initiative-based combat of modern D&D. Now, these traps trigger on initiative counts (10 is common) making initiative important in a combat-light dungeon. Awesome.

My final (and only negative) note on the conversion is that Acererak is a full-blown Demilich (MM pg. 48) rather than being the soul-sucking trap from the original. This takes away from the lesson that brute force won't solve problems. Also, the blessed sword in the final room is a Defender. They finally made a high-level campaign and couldn't give out a Vorpal Sword or Holy Avenger?

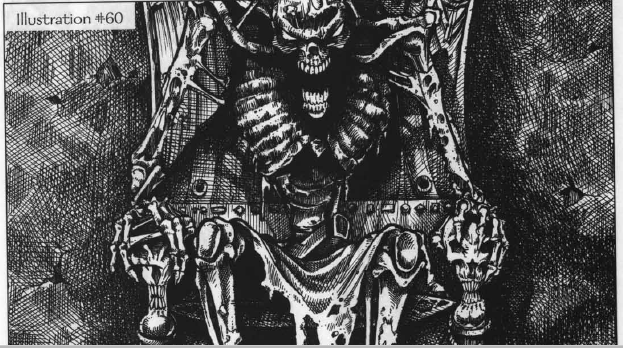
So long, farewell... and good riddance!
And that concludes this series. I hope it was informative and helpful, and if you do try to run the Tomb of Horrors, you keep the lessons of the tomb in mind.

Please let me know if you enjoyed this type of article. There are a lot of classic modules out there, from the recently-reprinted White Plume Mountain to rarely-revisited adventures like The Sinister Secret of the Saltmarsh. Being a D&D player for only a few years myself, it was a lot of fun to dig through this old tome, and I would definitely be interested in doing so again if there was some interest.

Thanks for reading!

Friday, April 7, 2017

Delving into the Tomb of Horrors: Road to Victory

https://www.3dartistonline.com/user/owsleyw
Boo
Welcome back to Delving into the Tomb of Horrors. Today I'll be analyzing chapter 6, "Tomb of Acererak Level", and covering areas 30-32.

Tomb of Horrors: Crypt of Acererak Level


30. Wondrous Foyer

We're nearing the end now, and these final areas really start to bring together all of the theming, lessons, and horror that we've seen over the course of the dungeon.

This foyer starts out by giving the players a vital component of the dungeon: the bronze key. There is a spell on it, but most parties will have at least one member who can pass the check. The key seems like the setup to a trap, and it is.
A door and a key? Hmmm. Seems easy enough.
The mithral doors have a keyhole, which could fit either key found so far, or the scepter from the last area. Of course, the keys are traps in this area, but the majority of the text here is devoted to what happens if the door is scratched or cut.

If the party has learned their lesson at this point, this encounter will never come up. The blood spurting from the doors is dangerous, unpredictable (magic effects range from instant death to fully healing the party), but most of all it is easily avoidable. This isn't as much of a trap as it is a test, that brute force won't solve things in the Tomb of Horrors.

A more dangerous trap is inserting the silver end of the rod into the door. This triggers that now-familiar "teleported back to the beginning of the tomb naked" effect. That's not terrible, but it might be difficult for the player to find their way back to the party alone.

31. False Treasure Room

Much like the "False Tomb Level", here is an area name you don't want to say out loud. This area is another test for the PCs, and it ramps up the difficulty quite a bit.
Aw, that's not so scary!
To start, this room prevents all magic except that used to detect magic or evil. This prevents the PCs from using a spell such as Find the Path or Augury to discern the next passage to take. It also prevents them from investigating the Urn or chests too closely. The very least they can say is some of them are magical and others aren't.

The Urn is a very straightforward test, and those parties who freed the Siren will likely get a couple wish spells for being kind to the Efreet. The lesson being taught (and tested) here is that NPCs shouldn't be approached rudely, or instantly killed.

I'm not really sure how much of a problem this was in 1975. Obviously, it merited a section in this module. But even in modern games, this remains a relevant lesson to learn. Modern RPG gamers decry "murderhobo-ism", where players just go around killing things and hoarding theri gold, forcing themselves to live like hobos. Despite this, OSR groups and systems praise the idea that they can kill indiscriminately, not worrying about things like NPC interaction or morals.
See? He's just a silly little demon
Usually the OSR mentality is directly linked to Gygaxian dungeon crawls and deadly games, but here we can see that Gary himself was trying to impart a different lesson on his players. He was trying to discourage muderhobo-ism. However, this part of his legacy seems to have been lost.

The rest of the room is fairly standard treasure and traps. If the players are still casting detect magic on everything, then the "strong aura of magic" from under the statue will be no problem to find. Additionally, it is mentioned that the "Iron Men with Visage Grim" are "More than meets the viewer's eye" in Acererak's riddle.

32. Out of Phase

This is one of the more confusing sections of the module. Out of phase... isn't really in the rulebooks. It was invented specifically for this dungeon, to deter spells like the ones listed in the module.

In my own interpretation, I would call this a portal into a room built on the Ethereal plane. The players will probably have been deterred from entering the plane anyway because of the dungeon-resetting demons. Aside from wish-proofing the space, that is a simple explanation that can accomplish the same goals.

This area tests the most important lesson of the module: inspect everything! The players could easily miss the entrance to area 33. Note that the punishment for doing so isn't just having to turn back around and look again: they could end up going through a one-way door that doesn't exist from the other direction.

This hidden door also reinforces, one last time, the truth in the riddle clue at the beginning of the dungeon. Acererak wants you to find him. If the players have disregarded the poem, they may never find the lich's true resting place.
Know your evil undead floating skulls. Chances are, if you don't die instantly you're not fighting Acererak.

Of course, after that, the only thing left to do is to enter the Crypt of Acererak the Eternal.

Which we'll get to next week.

Thanks for reading!

Friday, March 31, 2017

Delving into the Tomb of Horrors: An Empty Throne

Screw this, I'm out - most players by now
Welcome back to Delving into the Tomb of Horrors. Today I'll be analyzing chapter 6, "Tomb of Acererak Level", and covering areas 25-29.

Tomb of Horrors: Tomb of Acererak Level


25. Throne Room

This entire article will actually just cover the traps in this single area. Areas 26-29 are rooms adjacent to the Throne Room, so it makes sense to look at all of them as a whole.

These combined rooms form the largest single "area" in the dungeon. As we'll see, this is essentially another test of all of the lessons the dungeon has taught the players. However, at this point there's no holding back. With plenty of instant death traps, unfair combats, and traps with little to no setup, here is where Gary really flexes his player-killing prowess. But it isn't just random death traps, as we shall see.
Keeping it spooky in 1975
But enough exposition, let's dig into this room. It's important to note that the door to the room has closed with no way to reopen it.

First, we have the pillars and devil faces. As I said about a month ago, these devil faces are not spheres of annihilation, but rather teleporters. If the players were told (perhaps, by more modern modules) that these faces contain spheres of annihilation, they will definitely do everything in their power to stop their companions from entering the mouths.

Of course, knowing that they are teleporters is also good for frightening the players. Either way, this trap is easily prevented by two spells the PCs should have ingrained into their fingers by now: detect magic and dispel magic. But the important thing to notice here is that the levitation effect and the breeze have no save. This gives the idea that anyone touching the pillars will be helpless unless they happen to have those spells readied.

Next we have the gem, which is another test of your player's experience in the dungeon. Wish-granting magic in a lich's tomb that regularly resets itself? This is a hard one to defend as a good trap, even if it very much lines up with the tone and theming of the dungeon.

The gem is a cool idea and all, but for this area it feels very on-the-nose. But, it was placed here for a reason, as you will see in just a moment.
Totally trustworthy
The last scene in this area is the throne itself, which is really more of a puzzle than a trap. I don't think that any competent player would wander into an evil throne room and put the crown on, but the solution to open the secret passage here is so esoteric that players might be frustrated into trying such a maneuver.

We already saw something like this in the Hall of Spheres. This is a little more devious, however. There's no way forward here unless the players mess around with the throne and scepter, and unlike the previous area, the poem found at the start of the dungeon gives no hints on how to solve the puzzle.

This brings me back to the gem. This area is one of desperation, and I imagine after a while at least one player would be willing to risk the obvious wish-granting magic the gem offers. This could cause some heated debate at the table.

Overall, everything in this area has been leading toward desperation and hopelessness. And this theme only continues.

26. Electric Blue
Guess who's back...
A small area, but finding nothing behind an obviously magical door reinforces the theme of hopelessness. I could imagine my players searching this closet three or four times over.

27. Swords and Shields

This room is another unique challenge that fits in with the theming of the area. As we will see in the next section, the swords and shields are here to prevent someone from exiting the Chamber of Hopelessness. However, they are powerful foes in their own right.
Possibly the only dragon in this dungeon
The mechanics here aren't individually important, but the point of it is: if a single PC enters this chamber, they are in for a deadly fight, and the odds only get worse as more and more enter. This room is not meant to be crossed. Even the spells to destroy the weapons are mostly high-level, meaning there's no chance that all of them could be affected at this point in the tomb.

This, combined with the fact that PCs wouldn't know that this area and area 28 are connected, will probably lead to them ignoring this room. At least, until they have exhausted the possibilities in the throne room.

28. Chamber of Hopelessness

Here is the ultimate example of the theme of this area. This chamber is meant to be the final resting place of any PC who ends up in the blue devil's mouth. The epithet is telling:
You who dared to violate my tomb now pay the price. Stay here and die slowly of starvation, or open and enter the door to the south, where certain quick death awaits. Whichever you choose, know that I, Acererak the Eternal, watch and scoff at your puny effort and enjoy your death throes.
Nothing but us bones here!
Woof.

On top of that, Gary is kind enough to throw a potion of diminution in there, which according to AD&D rules won't get you small enough to escape through the snake holes.

I think this is the best example of theming in the whole dungeon, because at this point Acererak has created this entire area to focus on desperation and hopelessness. So, why bother simply killing PCs when you can trap them in a room to starve to death? Or for that matter, when you can pervert their wishes, or turn them into foul-smelling powder. The point is this: every part of your dungeon's traps and encounters can fit with your theme.

29. Mummy Chamber

This door appears similar to the Electric Blue door before, but contains a mummy. This creature is a strong foe, but not unbeatable. The worst part about it is its fire resistance (when mummies are normally vulnerable to fire) and the haste spell cast upon it.

This is a weaker expression of the theme of this area, but it is essentially another dead end. The players get no hints about how to escape this area.
Go cry to your mummy!
Overall, this area is a good example of how every single part of a dungeon can flow along with them theme of the dungeon. But if your theme is something like "Dragons" or "Magic Traps" you will quickly create a dungeon that doesn't offer much variety to your players.

Better themes fit with adventuring tropes and are esoteric enough to be applied in many ways. This area's theme was hopelessness. The players were forced to consider bad options to try to escape. And many of those options ended up leading to even worse problems.

But what about a dungeon with the theme of "Bravery"? What about "Deception", "Sacrifice", or "Glory"?
Here's a relevant picture to make up for that last caption. I'm sorry.
These themes could create whole campaigns, since there are so many ways a DM could create tests of those ideas, traps based on them, or challenges that require them.

And in the end, theming also helps set the tone of your game. There's a reason the "deadliest dungeon" in D&D chose hopelessness for a theme.

Thanks for reading!

Friday, March 24, 2017

Delving into the Tomb of Horrors: Instant Death

Back in my day, we just rolled up a new character and didn't complain!
Welcome back to Delving into the Tomb of Horrors. Today I'll be analyzing chapter 6, "Tomb of Acererak Level", and covering areas 20-24.

Tomb of Horrors: Tomb of Acererak Level


Well, boys and girls, this is the proverbial "it". On the entrance level Gary taught the players how to explore the Tomb with little danger. In the False Crypt level we tested those ideas and expanded the threat level a bit.

But now we are at the bottom level, the Tomb of Acererak himself, where any slip-up can result in lethal levels of damage, instant death, or worse. In fact, four of the first five areas are just that: incredibly deadly traps with little to no way to avoid them.
Won't happen in this dungeon

But is that really true?

Again, I still think there are lessons to be learned here. These traps require careful thought, thorough investigation, and utmost caution. But they aren't unbeatable.

20. Deadly Spikes

Here we see yet another example of Gary turning dungeon crawling conventions (which existed even in 1975!) on their head. Moving across the bottom of the pit seems to be the best method of travel, but even those poking ahead with a 10 ft pole will be affected by the spikes triggered at the end of the pit.
Use vertical stripes to make your dungeon appear slimmer!

Fortunately, this trap isn't terribly deadly, despite the name. Characters will take about 17 damage on average, even with a THAC0 of 10. I think this trap is another indicator of the change in difficulty, much like the door leading out of the laboratory.

The players are essentially getting a second warning that the traditional method of using their first idea on a trap won't work. This idea is a new one in the dungeon so far, but suffice to say it will affect every single trap in the rest of the dungeon.

21. Agitation

Here's where we get our first encounter with an instant death trap. If the players rip or burn these tapestries, they could be subjected to massive damage, or even death in three rounds. Let's go back to the trap breakdown from a couple weeks ago to see exactly how a trap of this difficulty is set up.

The Setup: We get two clues the tapestries are trapped. First, the read-aloud text says that while the room appears looted, the tapestries are untouched. Second, those who open the trunks and release the asps could observe that the snakes don't flee anywhere near the tapestries.


"Looted" in a dungeon that resets itself...
This isn't much to go on, and many groups could be told these facts and still be surprised by the tapestries. However, as Gary said, this is a "thinking person's" Dungeon. The rule from before remains that deadlier traps need more setup to be effective.

The Betrayal: This deadlier trap has a more complex betrayal. First, the PCs need to figure out the agitation mechanism. With the treasure to be found, the combat with the snakes, and searching the room, it is entirely reasonable that the PCs will be in motion most of the time they are here. But with a room-wide effect, it usually will cause the PCs to stop and wait, which will clue them into how the agitator works.

Alternatively, the PCs could be paranoid and burn the tapestries, setting up the second betrayal with the brown mold.

The Chance: Since this is a deadly trap, there's less of a chance to avoid the effect here. The brown mold in particular is nasty, not allowing any save for the damage it causes. The green slime is slightly better, because though a person caught in it only has three rounds to escape, most groups could easily deal 50 damage to the slime within that time.

Overall, this trap is difficult and could cause death, but it is still fairly easy compared to later traps.

22. Siren's Cavern

This area starts with little setup, but instead hampers the players and offers them the potential for a reprieve from that setback.
Hellooooooooooo hearse!

The PCs are likely to trigger the siren's song from outside the room, and at least one PC will fail both saves required to cause them to "become idiots". This could be considered comparable to a feeblemind spell in later editions.

Fortunately, the Siren herself can easily be obtained as an ally and undo this effect. But Gary is once again playing with the tropes of dungeon exploration.

There are two sacks of treasure here, and touching either one causes the siren (and the other sack) to disappear. It would be all too common for a group's rogue to tell the others to talk to the siren while they inspected the treasure.

This is a highly complex setup and betrayal. The sack that radiates magic is perfectly safe, except that it makes the siren disappear. The nonmagical sack could very well contain wool and be worthless, and also causes the Siren to disappear.

It's interesting to note that the text says the siren and the sack disappear forever. I believe this means that Gary intended this to be a one-time challenge. Additionally, if the players cause the Siren to vanish, they will have to get their idiot friends up to "breathe clean air under the warm sun", which means many of the traps would be reset. However, this trap wouldn't be, if Gary's instructions are followed exactly.

Again, this area is meant to challenge the group's ability to comprehend situations, not just their dungeon-barrelling prowess.

23. Secrets and Swords

This area is fairly simple. It just reinforces the idea of not giving up after your first attempt to inspect something.

Keep your eyes peeled!
I think it's important to have small areas like this that reinforce the theme of the dungeon. It doesn't have to be anything wild or crazy, just a single door or a room that says to your players: "Don't forget where you are."

And even though this area doesn't have any danger, if the players don't follow the lessons taught in this dungeon, they will have to face...

23. Sleeping Juggernaut

Possibly the most directly unfair area of the entire dungeon. Let's break it down.

Is... are you crying...?

The Setup: Hardly any. We get this clue: "The double doors in this area are unusual in that they swing open in either direction. When they open, they fit into depressions made for them in the corridor walls."

So, the players get a mild hint that likely won't make sense until it's too late. Then they get hit with the betrayal.

The Betrayal: There's little chance that all the PCs will be far enough away to avoid the sleep gas, which has no save. "Elves and those who hold their breath are not affected" which would be few and far between in any given party.

Then the juggernaut comes and crushes sleeping PCs, no save.

The Chance: There's only one way to avoid this trap: at least one elf in your party, who can wake the others up, then pure luck that the juggernaut doesn't crush you before then.

This trap seems to break the rule we established before, where deadly traps have more extensive setups. But I don't really see this as a trap.

Instead, I think it is a punishment for ignoring the lessons of the dungeon while the PCs passed through area 23. This might be a little harsh for modern groups, but the idea of an area that punishes those who don't follow the themes of the dungeon is completely usable.

In a modern game, though, I would recommend not making the punishment so deadly.
Sure, my friend's an idiot and the Siren who could fix him disappeared, but hey, free spell scrolls!
Next week, we'll travel into the largest area in the dungeon, and one that is chock-full of traps of extreme deadliness.

Thanks for reading!

Friday, March 17, 2017

Delving into the Tomb of Horrors: Son of a Lich

Just two buds hanging out
Welcome back to Delving into the Tomb of Horrors. Today I'll be analyzing chapter 5, "False Crypt Level", and covering areas 17-19.

Tomb of Horrors: False Crypt Level

Last week, the players found a secret door at the bottom of a pit, and now we get to see where it goes! The answer, of course, is nowhere safe.

17. Corridor of Fear

This area features essentially one trap, a fear gas that is nearly invisible (1 in 6 chance of seeing). Gary has been building up this area as dangerous, and this gas trap definitely counts. If the PCs even see the gas, they still might need to make multiple forays into the vapors to even find the way forward.

This area is fairly straightforward, but the interesting thing to note is that Gary lays out exactly what actions a PC affected by the gas will take. I think this is a good move, since many modern interpretations of "fear" don't specify the direct changes in a character's actions when they are affected by such a fear.

Even in modern D&D, the descriptions of Fear and Charm are much more mechanical than describing the outcomes of those conditions. It wouldn't be difficult to add a sentence or two describing how magical fear varies from normal fear, or what makes a magical charm different than simply liking a person.

Obviously, a lot of these can be fudged in social encounters, but in a dangerous dungeon such as this, it's good that Gary specified exactly what dangers a character might face.

18. False Crypt
It's the encounter on the cover! Exciting!
We are finally at the eponymous False Crypt of the false crypt level. This entire level has been a build-up to this deception, so let's look at how Gary builds this up, and how a group of adventurers might realize the angle that's being played here.

First off, there are a lot of signs that this is indeed the final battle of this dungeon.
  • The Corridor of Fear beforehand
  • The webs that can specifically only be burned away by magic
  • The solid gold couch and lavish treasure in the room
  • The booming voice
  • The ability to turn spells
  • And, of course, the programmed illusion after the false lich's death

But as always, Gary has given out a lot of hints that this is a falsehood. The best hint still comes from the poem at the beginning of the crypt:
Then no lower thou goest / If thou checkest the wall 
The mace is also a big clue. Many parties might reasonably think that it was left by a former adventurer, but if that were true then where are all the other weapons? Also, those groups that have learned that the dungeon resets itself might wonder why this item is always spared the reset.

Woah, who walks in without knocking??
The last big clue comes from the lore surrounding the Tomb itself. An experienced player should know the difference between a Lich and a Demilich, and this "zombie lich" is clearly meant to imitate the former.

This gives some good insight on how to build a "false" area into a dungeon. Many dungeons are built with areas that lead to a dead end, but imply that their path is correct. what can we take away from this area in the Tomb of Horrors to help build such a trick?

First, use genre conventions to your advantage. Dungeons tend to become more dangerous the further they go, so including the corridor of fear and the magic webbing makes the players feel like they are fighting towards the right path.

Also, the lavish treasure in the room (and the subsequent destruction of that treasure) signals that the players have stumbled onto an important area. Of course, this isn't true, but normal dungeon-building conventions support this idea.

Second, make the threats in the area convincing. This false lich doesn't do much damage, but parties are likely to start throwing spells at the monster quickly and infer that anything able to resist high-level spells is indeed extremely dangerous. Giving the false lich a booming voice also assists in this illusion.

Finally, you want to include a tip-off or two. Something that could go along with genre conventions or present a credible threat, but if the players think about it a bit they will realize that something is fishy. Or something in the lore of the dungeon that doesn't add up. You want to reward players who think about their situations instead of just rushing in.

Of course, just making a situation where the players decide to turn around and go back towards the correct path isn't terribly compelling. That's where we get to the programmed illusion.
Rocks die, everyone falls
Essentially, the players will likely have an idea that this isn't the final tomb of Acererak. But rather than just asking them to turn back, Gary asks them to make a bet. The players have to bet on whether or not this is the real tomb, the real treasure, and a real earthquake. The stakes are a room full of treasure, or their lives.

This is an awesome choice, and one that has a lot of depth to it. It isn't just run or stay. The players must consider if the lich will return and the earthquake will happen again if they leave and return. Note that there is actually a loss in this: a large amount of the treasure in this room isn't there upon their return. They also have to consider going back through all the other traps from earlier. At this point it is unlikely that they have discovered the shortcuts yet, so this adds another layer to the choice.

The only unfortunate thing about this type of encounter is that you really do have to use it sparingly. Otherwise the players will never trust you with plot or story items again.

19. Laboratory

If your players reach this area, technically they are out of the danger of accidentally going to the False Crypt. However, I believe this was included on the False crypt level for two reasons:
  1. It's still physically above the rest of the dungeon. In old school dungeons, "levels" of the dungeon were taken quite literally.
  2. It's nowhere near as dangerous as what's coming next.
There are a few hints to be gained here, like the presence of mummies later on and a small hint to confirm the nature of the false crypt. Overall, however, this area is all about getting the first key of the dungeon.
They did the monster vat

This room accomplishes this by reinforcing the idea that everything should be inspected. There are three vats, and half of the key is in two of them. If the players happen to inspect the first vat and find it only to contain dirty water, they might miss the other two vats if they haven't learned to inspect everything.

The vats themselves are fairly straightforward, but I do want to put a note forward on the door out of this room.

Basically, you need to look at the door with the Gem of Seeing or something else that allows truesight. Only then will dispel magic or remove curse affect the perfectly impervious seal on the door.

This may seem extremely difficult and convoluted, and the players will likely protest. But I think this door is an effective crossroads into the final layer of the dungeon, where traps require multiple layers of dissection in order to solve. This presents the idea of greater, less forgiving difficulty in a relatively forgiving situation.

And next week, we'll discover some of the horrifying ways that Gary plans to use these complicated traps.
He's coming, he's coming, he's coming
Thanks for reading!

Friday, March 10, 2017

Delving into the Tomb of Horrors: Take me to Church

1 in 7 children grow up to be wizards. Parents, don't let this happen to your child!
Welcome back to Delving into the Tomb of Horrors. Today I'll be analyzing chapter 5, "False Crypt Level", and covering areas 14-16.

Tomb of Horrors: False Crypt Level

It might seem odd to call this the false crypt level. The ending is being spoiled! But remember that in these old dungeons, players didn't get a chance to see the module or hear the names of places before they barrelled through them.

In my Princes of the Apocalypse games, I often walked my players through areas with awesome names, like the Thunderhammer Brewery or the Plaza of Fallen Spires. And usually I would end up accidentally saying the name out loud, even though the characters would have no knowledge of what this particular area was called. Sometimes I would even have an item in the room or an NPC refer to the area, just to say the name.
The floor says "Entryway" for some reason
Now, I don't think there's too much to be lost by letting names slip, but in some cases it's vital to keep the name secret. A modern example would be the mini-adventure in Curse of Strahd  I covered a couple months ago, Death House. If you just call the building "Death House" your players will probably never enter. Find an alternate name, put it in all your notes, white out the real name if you have to.

If the players hear you say "False Crypt Level", you're going to miss out on a nice surprise Gary left for us on this level. But that's for next week.

14. Chapel of Evil
Before you say your vows, you better say your prayers
Here is what I would consider the first "real" traps of the game. As a side note, I think a good trap requires three things:
  1. The Setup: players need to be aware that an item might be trapped
  2. The Betrayal: players who are too greedy, move too quickly, or misinterpret information will fall prey to the trap
  3. The Chance: Every trap needs some way to avoid, mitigate, or reverse its effects. However, this can also act as a setup that leads to a second betrayal.
The most important part, and the part that isn't included in the DMG, is the setup. Making the players aware of a potential trap gives them a choice. And without the choice, you aren't really playing an RPG, you're just making your friends mad at you. So, let's go through the different traps here and see how they work in this framework.

First we have the pews. The setup here is a tricky one, since the players may not even think to open the pews. But if they do, they have a 2/3rds chance of opening one with treasure. Thus, greed is the betrayal here, or at least it is intended to be. It might happen that players open the front pews first. However, the chance to avoid the trap is fairly good, they get a saving throw and the effect only lasts 2 days if they fail.
Cool setup, but ain't nobody got time for that
The altar has a more complicated setup. It goes all the way back to the poem in the true entryway, when Acererak called this area "my temple." So not only can the players guess that this area might be evil, but it emanates evil as well. The betrayal here is failure to accept the clues of the dungeon, and the chance is proportionately dismal. Save for half is still a pretty bad situation.

The cursed portal has a great setup. Players should know by now that portals are bad business, but there is that skeleton pointing right at it, and no other obvious way out of the chapel. So a player might step into it, only to have their alignment and sex changed. Of course, the chance here is not avoiding the effect but rather the ability to reverse it. But this sets up the second betrayal: it was a teleporter all along!

Here's an important point about deadlier traps. Obviously, the chance at reversing or mitigating the effect of a deadly trap will be lowered, but the setup for such a trap should be made more apparent to counteract that! When that happens, the players can be given more choices, and their deaths will be in their own hands, rather than in the roll of the dice.
Gary Gygax vs player, restored from original, 1564
As for the exit to this area, here is why I would place a Ring of Protection inside the silver chest from area 13. If the players happen to not have a magic ring at their disposal, they are effectively blocked from the rest of the dungeon. This way, they have a chance to go forward, but it requires them to activate a trap earlier in the dungeon, and it reinforces the idea that the treasure within the Tomb of Horrors is not theirs to keep.

15. Pit Trio

Here is another area where the players could easily miss the way forward. However, the setup for this trap is really the entire first area of the dungeon. Players should be aware of false doors, pit traps, and secret doors at the bottom of pits. That is if they explored thoroughly and learned all the lessons from the first area of the dungeon.

Not only that, but we get another clue from the entyway riddle: "Skip thou two, leading to a fortuitous fall". Good foreshadowing, and further cementing the trust in the poem.
Tombo of Horrors 101: Follow the Fruit by the Foot
Notice the unusal nature of this secret door. Once you open the counterweighted trap door, you have a 5-in-6 chance to see the wood painted like stone door. This door was meant to be found! But opening the to of the pit is likely something that most parties won't fall for. Again, the chance to avoid the trap is becoming a second betrayal.

16. Slide to Doom

Here is another great way to use a setup.This door is difficult to get through for rogues, wizards, and clerics, exactly the type of characters most players would think to bring to an ancient temple of evil magic. Gary is giving the group one last chance to go back and check out area 15. The sounds eminating from the door give it another layer, hinting that this might be a trap. Who plays happy music in a lich's tomb?
If you don't turn on Yakety Sax for this scene, just quit running games
Of course, the betrayal and chance are pretty clear here. Interestingly, the module refers back to area 2 for directions on how to run this encounter. Again, Gary is trying to set a precident on how to deal with deadly but fair traps.

Hopefully this isn't the last areas the PCs see. But coming to a "dead end" like this can be frustrating. Remember that the PCs can easily retreat and rest, but all the traps will be reset when they do. Use that as an opportunity to re-teach the players about spike pits, secret doors, and looking for hidden things in obvious places.

Next week, we shall see exactly where that hidden door goes!

Onward! To certain death!
Thanks for reading!

Friday, March 3, 2017

Delving into the Tomb of Horrors: The Hall of Spheres

Welcome to dying
Welcome back to Delving into the Tomb of Horrors. Today I'll be analyzing chapter 4, "Entrance Level", and covering areas 8-13.

Tomb of Horrors: Tomb Entrance Level Area

8. Gargoyle Lair

Holy smokes! We start off with an honest-to-goodness combat. After all the raps of the previous section, a four-armed Gargoyle is a welcome change.
Ooh, I'm big and scary! Oh noooo!

In fact, I'd go as far to say that this room is a reward to players who figured out the entrances. Here's my rationale:
  1. Straightforward combat in a non-trapped room
  2. Again, evil and magic radiate from the door
  3. The players can "get one free attack each with missiles or magic"
  4. 10 huge 100GP gems on the neck
  5. Another hint: this one calls out the color gold and mentions an archway
We'll see how the colors from these hints play into the dungeon in the actual Hall of Spheres, area 10. But the important takeaway is that this area  is a waypoint, and fairly early in the dungeon.

9. Complex Secrets

This area is a series of rooms with a low-level trap in a few of them. Here, the players learn a few other lessons that will help them later on in the dungeon.

First, secret doors, everywhere. If the players weren't clued into looking for secret doors everywhere already, they will have to search everywhere here. Nicely of Gary, they only have to deal with the trap every other room.

The next big lesson has already been hinted at with the misty veil and the devil face in the first area: these magic traps can't be avoided or disabled. Setting up that expectation early and (relatively) painlessly can prevent some table-flipping later in the dungeon.
Everybody loves traps without saving throws
And these traps really are pretty painless. Save vs magic, and only 1d6 force damage if they fail? The only thing that makes this dangerous is that the random nature of searching for secret doors in AD&D could potentially stack up the damage. But even then, the traps are only every other room, giving clerics a chance to heal up after each trapped room.

The other thing that makes this difficult is the "trial-and-error" nature of the secret doors. But once the door is found, retreating to a safe area and poking with the great 10 foot pole will ease the pain.

Again, Gary is rewarding smart players, but not in too deadly a fashion yet.

10. Hall of Spheres
Liches have been known to absentmindedly doodle in the corners of their dungeons
Here we are, the second big hub area of the Tomb of Horrors. There's a lot to learn here, but let's start with a lesson that we hinted at earlier.

Gary gives us a long hallway with many images, some which are vitally important, some which are not. But he doesn't just describe the important ones. We get a whole table so that the dungeon master can relay information about any picture the players want to inspect.

Now, the players enter through a one-way secret door, so they might start searching for secret doors. And in AD&D searching for secret doors doesn't reveal illusions, which modern gamers might not enjoy. "Searching the walls" in a modern game will probably yield information on illusions and secret doors. I don't think that's what Gary intended to happen here.

So, players are supposed to explore this entire area, probably running into the trapped doors at least once before they start looking for illusions. But once they find the illusions and explore where the passages go, we find another important lesson Gary conveyed here:

Clues can be trusted in this dungeon. So far, we've had the following color information:
  • Shun green
  • Red is blood's color
  • The shade of night is for those with great valor
  • Ignore poppy's hue
  • Also color of ice
  • Look high and low for Gold
And sure enough, Green, Poppy's hue (light violet) and Color of Ice (light blue) lead nowhere. Red leads to a trapped room (Area 13), gold leads to more treasure (area 12), and the shade of night (black) leads to the next area.

Now, up until this area, players probably have doubted the clues in the riddles they have found. This dungeon does have a bad reputation, they may have even purposefully ignored the clues in order to try to "outsmart" the Tomb. But here we're getting hints that the clues are correct, indeed, that they are the way forward in this dungeon. Players often have reservations about trusting hints left by evil creatures, but here Gary is encouraging them to reconsider.
Look at this guy. Who wouldn't trust him?

11. Another Veil

This is the first trap in the dungeon that pulls a signature Acererak move: teleport you back to the beginning, minus your gear, which goes to the dungeon's final treasure room.

Fortunately, this archway is fairly close to the beginning of the dungeon, so a character might actually be able to make it back to his companions, albeit without any gear or treasure. Hopefully the person holding the gems from area 8 didn't step through.

Again, this trap is foreshadowed by the last veiled archway. Unless players "solved" the last archway, they should know that this trap is a teleporter. So, there's really no excuse to go through it.

Unless of course your players have exhausted their search for secret doors and haven't found the illusions yet.

12. Statue's Lair

Here is another reward area, in the best sense of the word. You can be teleported here by solving the entranceway arch, or by following the clue given in the Gargoyle's room.
One of many extremely metal statues in the Tomb
This area also reinforces another key element of the dungeon: you have to sacrifice treasure to get ahead. That will come up a few times more before the players are finished here.

The Gem of Seeing is a great reward for the players, even if it breaks after 12 uses. I don't think there are 12 places that the Gem of Seeing is required, but obviously Gary was being nice and letting the players look around a bit.

13. Chamber of Three Chests
Bad worse, and just awful
Here is the final lesson Gary is teaching the players before they enter the real dungeon: Sometimes there won't be a good option. Sometimes all the choices are bad.

However, there is certainly a small victory available in this room. Careful players (who have been searching rooms for secret traps) can find the passageway back to the entrance. That's a big victory on a meta-level, but also gives the players a chance to retreat and take on the rest of the dungeon fully-rested.

The three chests aren't much aside from being basic no-win traps. Still, the chests each reveal something small.
This dungeon is a pain in the asp
The Gold Chest encourages players to notice the snake holes again. That can prove important for certain players later on.
ARROW'D
The Silver Chest actually has treasure the heroes can keep! Now, from the text it seems like something is missing here... We find a small locked coffer that can't be easily opened, but with no comment on what might be inside. In my personal games, I would put a Ring of Protection in the coffer. I'll expound on why next week.
Hey guys, it's... oh, whoops, did I interrupt something?
Finally the Oak Chest, which reveals the true nature of the Green Devil face. This is a clue to how the other devil faces will work. Also, there's a great little scene Gary plays out here, with the undead corpse of a former comrade leaping out and embracing one of the players. Good stuff.

And that's the end of chapter 4! There's a lot of lessons and foreshadowing here, if you know where to look. And players don't usually do. So as the dungeon master it's important to impart that information, explicitly if necessary.

Remember the good old days of poking a cliff with sticks?
The rest of the dungeon will be deadly enough, believe me.

Thanks for reading!